
How to: Control Password Protection by Default for Zoom Cloud Recordings
-
- Visit your JCCC Zoom account profile. There’s a link to it on the JCCC Zoom home page (https://jccc.zoom.us) as shown in the illustration below. The direct link to your account profile is https://jccc.zoom.us/profile, but you can also read further on this page and use the live direct link in Step 3 to skip straight to Step 4. (Steps 1-3 are included here to help give a sense for how your JCCC Zoom account profile is accessed and organized in general.)

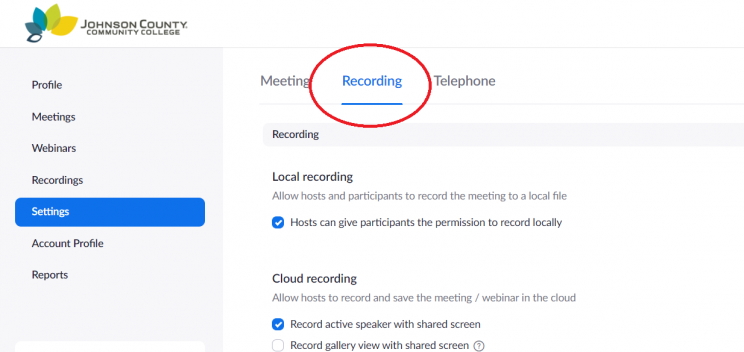
- On the Zoom account profile menu, click “Settings”. This is the fifth item on the menu, the fourth below “Profile” itself.
- On the Settings page, click “Recording”. This is the second of three horizontal tabs which compose a sub-menu for settings, as shown in the illustration below. The direct link to the “Recording” tab is https://jccc.zoom.us/profile/setting?tab=recording
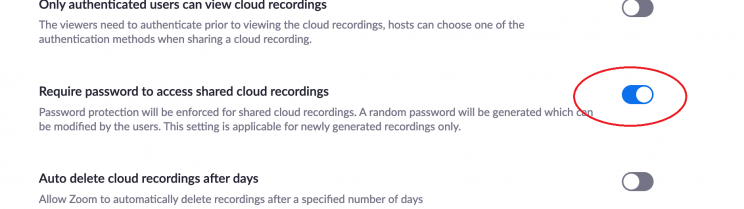
- Scroll or navigate to the “Require password to access shared cloud recordings” field. This is a checkbox-type field, but Zoom renders those as slide switches: gray with a white circle on the left for “off”, blue with a white circle on the right for “on”. If your general preference is not to require a password for students or others to view your recordings, set this field to “off”. You can always put a viewing password on individual recordings when needed.
- Visit your JCCC Zoom account profile. There’s a link to it on the JCCC Zoom home page (https://jccc.zoom.us) as shown in the illustration below. The direct link to your account profile is https://jccc.zoom.us/profile, but you can also read further on this page and use the live direct link in Step 3 to skip straight to Step 4. (Steps 1-3 are included here to help give a sense for how your JCCC Zoom account profile is accessed and organized in general.)
Changes made to your Zoom account profile settings go into effect immediately. There’s no button to save or update, but you may see a temporary banner appear notifying you that the change is in effect.