Tag Archives: astrophotography

Imaging Comet 46P/Wirtanen

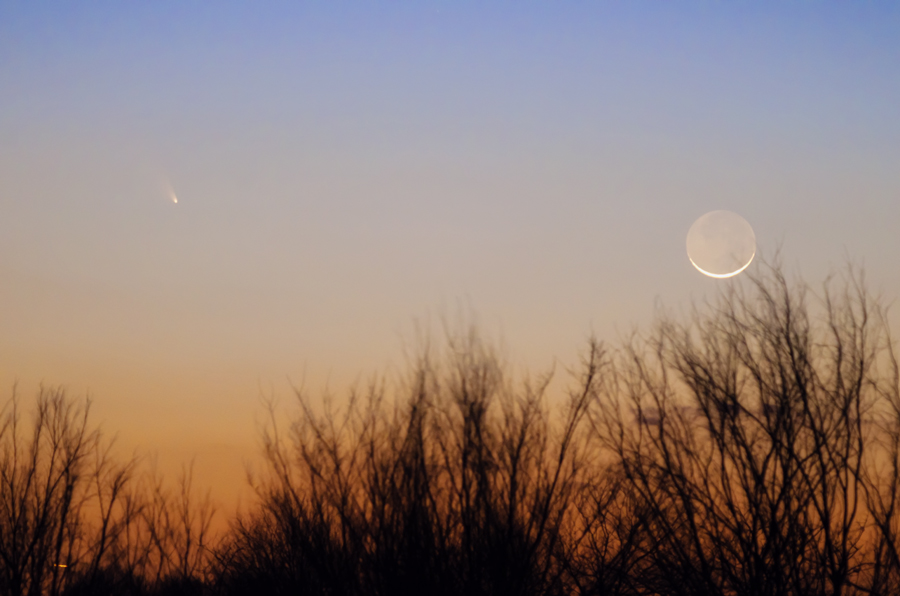
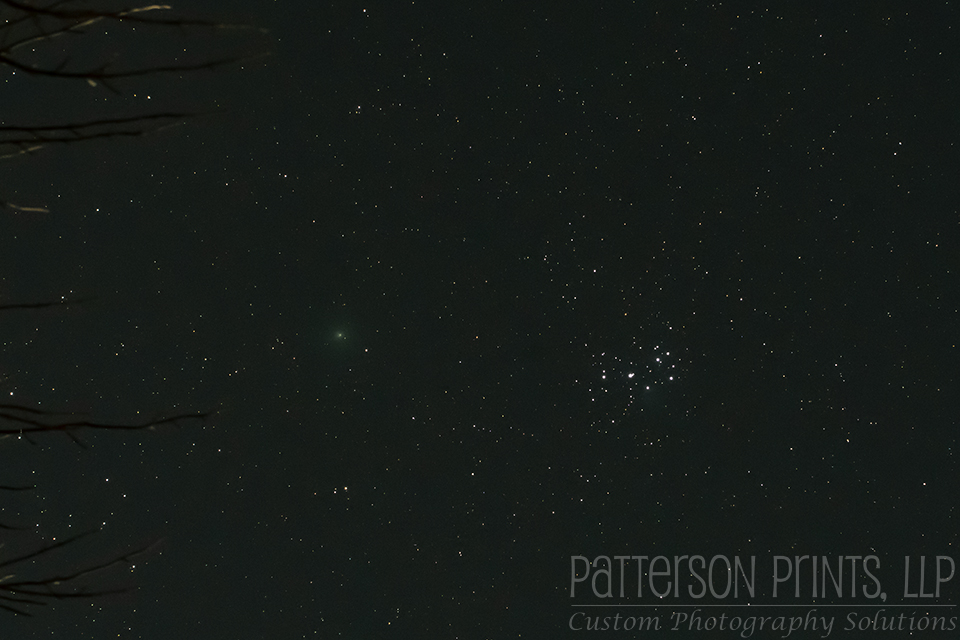
Sunday night, December 16th, was the evening of the closest approach of Comet 46P/Wirtanen. The comet was close enough and bright enough with an apparent magnitude between 4.0 and 4.5 that you could see it with the naked eye if you had good, dark skies. Thankfully, that’s just what I have living out in rural Missouri, and we also had crystal clear skies. The comet can be seen between the Pleiades Cluster and Taurus through Wednesday, but as the Moon’s phase transitions from 1st Quarter to Waxing Gibbous, dim objects in the sky will be harder and harder to see. Throughout this coming week, the best time to view the comet will actually be in the very early morning after moonset. You can check out more about where to find and when to view the comet at Sky and Telescope, https://www.skyandtelescope.com/astronomy-news/observing-news/comet-46p-wirtanen-and-moon/.

Comet 46P/Wirtanen passing between the Pleiades Cluster and Taurus.

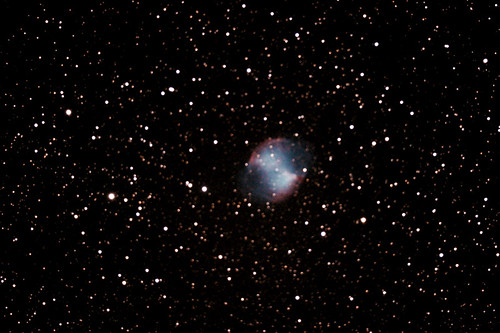
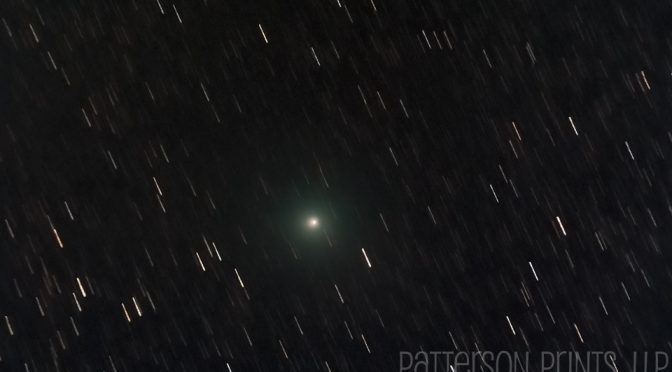
The image below of Comet 46P/Wirtanen is the result of stacking 63 exposures each with a shutter speed of 20-seconds, ISO 6400, aperture f/8, and a focal length of 200 mm on a Nikon D500 through a Tamron 70-200mm f2.8 riding atop a Celestron 8″ SCT. The telescope was there just to provide the clock drive so that the camera moved with the stars’ diurnal motion. Each raw image file was corrected for dark current, bias current, and the response across the frame was normalized using a flat field image. I’ll write up a tutorial on how to collect these images and why they’re necessary later. The images were then aligned and stacked on the comet, which is why the stars appear as streaks. Since the comet is moving quite rapidly past us, its motion relative to the distant background stars is very noticeable, even in the short timespan of this image set.

An long exposure image of Comet 46P/Wirtanen tracking the comet’s motion rather than the stars’ motion.

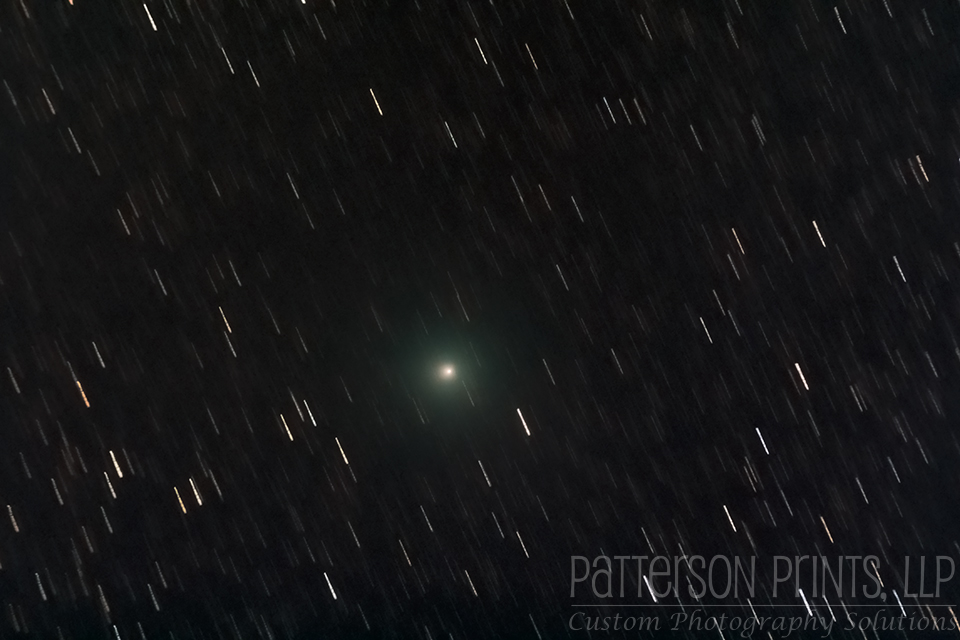
You may have noticed the very green color to many of the images of Comet 46P/Wirtanen, including this one. The green color is not a image processing artifact, but is indicative of the comet’s composition. Most comets contain a enough cyanogen (CN) and diatomic carbon (C2). As a comet approaches the Sun and its surface warms, volatile materials such as cyanogen, water, and others begin to vaporize forming the comet’s coma and tail. When cyanogen and diatomic carbon interact with the Sun’s ultraviolet light and fluoresce to create the characteristic greenish glow of many comets.

Comet PanSTARRS Is Tricky But Worth The Effort

There’s a comet in our skies this week! With Comet PanSTARRS being so close to the Sun and therefore so low to the horizon, seeing this first major comet of the year is tricky! The comet is viewable about a half hour to an hour after sunset, but don’t expect it to leap out at you. You’ll have to look hard for it. With the clear skies last night, I tried to see if I could spot the comet without aid, and it was tough. I couldn’t see it at all at first, not until the skies darkened considerably. I had to wait until a little before 8pm as Orion was starting to become visible before I could find the comet. Even then, I had to look very closely at the sky maps published at Sky & Telescope’s website to make sure I was looking in the right spot. Binoculars really helped. My 200-500mm zoom lens helped more! I finally did get an image of Comet PanSTARRS along side the Moon.

The image I captured was with my Nikon D7000 (a 1.5x crop sensor) with a focal length of 200mm (300mm 35mm equivalent) at f/5.6, a shutter speed of 2 seconds, and at ISO 800. I did some noise reduction in Photoshop, but didn’t do anything else to the image. I like how the night side of the Moon is visible when it’s just an ultra thin crescent like this.

The Joys of Country Living

People often ask me, “Doug, why do you live so far out in the country? Wouldn’t it be easier if you lived closer to campus?” Well, sure my commute would be a bit shorter, but then I’d never see night skies like this from my driveway.

Our Milky Way Galaxy extending up above my barn. This was taken on Friday, August 17th around 10pm-ish.

During late summer and early fall, if you look to the south in the evening, around 9-10ish, you’ll see the constellation Sagittarius, or more likely a subset of it the asterism of The Teapot. When you’re looking at The Teapot, you’re also looking toward the central core of our galaxy and the disc of our galaxy will extend almost straight upward from it. If you live in the city, this magnificent view will be denied to you by the copious amounts of light pollution from street lights and security lights. In order to get the view I get to see every clear night, you have to drive away from the reach of all those city lights. Getting to see the night sky like this is well worth the extra commute time for me!

This photo is a combination of 28 images each taken at a focal length of 18mm with an aperture f/5.6 and a shutter speed of 6 seconds at ISO 3200. I simply sat the camera on a tripod, locked down the shutter button, and walked away for a while. The images were combined using Deep Sky Stacker, a piece of freeware that automatically rotates and aligned a stack of individual images. It doesn’t take a fancy camera, just patience and good skies.

Imaging the Night Sky in Motion

So I’ve been meaning to try something new for a while now and I just got it worked out (sorta) this past week. I’ve always enjoyed photographing the night sky, but I really wanted to work on taking images that showed the sky in motion. It’s so easy to go outside, glance up at the sky, and think of it as static and unchanging, but if you look carefully enough, you’ll see that it’s in constant motion. I did a lot of work last year imaging the sky in a static way, either by shooting through a telescope with a clock drive, or by stacking a succession of individual images. While I really enjoyed some of the images that I captured through those methods, they didn’t really portray how rapidly things move around in our night sky.

In thinking of ways to demonstrate this motion, the first obvious choice was to do a typical “star trails” image. I’ve attempted these type of images before, but this past week, I tried to up my game a bit. My trails images before were only about 10 to 15 minutes in length, but the one I took last Thursday was approximately an hour-long exposure. The resulting image turned out pretty good, all things considered. I have a dusk-to-dawn light (that I need to put on a switch!) that’s great for security, but not so great for viewing the night sky. To combat its effects, I set my camera up on its tripod on the far side of my barn so that the barn blocked most of the light. The trees and surrounding ground, as you can see in the image, were still fully illuminated. My light and others around the area also light up the sky, so rather than a deep, dark background sky, I got a kinda pink-ish background. The star trails themselves, came out great.

Here’s the EXIF data for the image.

Camera Nikon D7000
Exposure 3099
Aperture f/5.0
Focal Length 18 mm
ISO Speed 200
Exposure Bias 0 EV

Even if you don’t have a tripod, you can still try this type of shot for yourself. You will need something to keep the camera steady. A beanbag or a bag of rice will work just fine. You will also need a remote shutter release. Find either a bright star or planet and manually focus on it, then set your camera to manual mode and set the shutter speed to “bulb”, and your aperture to your lens’ sweet spot. For the lens I was using, that happens to be about f/5.0. Even though it’s night, don’t use a high ISO. The length of the exposure will gather all the light you need. Once it’s ready, lock the shutter button down and go back inside where it’s warm and wait. 🙂

Practice, practice, practice, and share your star trails pics, tips, and suggestions in the comments section below.

Astrophotography FTW!

I had hopes of doing a LOT more astrophotography than I actually did over the summer. It seemed like every time I was home and free, it was either cloudy or so humid that dewfall was a constant problem. This weekend, I finally had time and good skies to go out and take some deep sky images. Some pics turned out, some didn’t. …I really need to work on my planetary photo skills.

I was able to capture a decent image of The Andromeda Galaxy, M31, and the Dumbell Nebula, M27. In both cases, I used JCCC’s 8″ Meade SCT on LX200 base mounted on an equatorial wedge with my Nikon D7000 mounted on the back. My alignment wasn’t great, so I couldn’t integrate any longer than 10-15s per image, but I took a few dozen images of each object and stacked them to produce a single long-exposure equivalent image.

M31-BW

M27-TheDumbellNebula

I’m hoping to get some solar images today, so check back later for some new shots.